VxRail 3.5 Deployment to VLAN without DHCP and changing the Initial IP for VxRail Setup

VxRail on a specific VLAN:
If you have to use a tagged management VLAN for your VxRail cluster, you must customize the management VLAN directly on each appliance, via the ESXi Command Line Interface, before VxRail is initially configured. Changes are required for two different portgroups on all ESXi hosts. The first portgroup is the ESXi “Management Network”, and the second portgroup is the initial VxRail management network, called “VM Network”. During configuration the “Management Network” is renamed to “MARVIN Management” and a new “Management Network” is created using the details provided in setup through manual entry or via a JSON file, the second portgroup is renamed “vCenter Server Network”.

Login to each of the four nodes via the console interface(DCUI):
Press <F2> and login with root and Passw0rd!
Go to “Troubleshooting Options” and press <Enter>
Go to “Enable ESXi Shell” and pass <Enter> to enable
Press <ESC> to save
Use <ALT-F1> to access the Shell
Login with root and Passw0rd!
Use the following ESXi cli commands:

esxcli network vswitch standard portgroup set -p “Management Network” -v <Your_VLAN_ID>
esxcli network vswitch standard portgroup set -p “VM Network” -v <Your_VLAN_ID>
/etc/init.d/loudmouth restart

Verify the VLAN ID was set with this command

esxcli network vswitch standard port group list

Type ‘exit’ to logout as root and <ALT-F2> to get back to DCUI

If you do not have DHCP on the VLAN you can go into the Management Network and set static IPs for each node…I’m pretty sure we’ve all done this a few times before.
Change initial IP for VxRail Setup:
From a vSphere Thick Client connected to Node1, expand the host to show the VMs and open the console of VxRail Manager.
Login with root and Passsw0rd!
Open Xterm and use the following commands:

systemctl status vmware-marvin
systemctl stop vmware-marvin
ip addr add <your new ip/mask> brd <broadcast> + dev eth0
ip addr del 192.168.10.200/24 brd + dev eth0
ip route add default via <your_gw_ip>
ip link set eth0 down
ip link set eth0 up
ip a
/opt/vmware/share/vami/vami_set_network eth0 STATICV4 <new_IP> <new_subnet mask> <new_gateway>
systemctl restart vmware-marvin
sytemctl restart vmware-loudmouth
systemctl restart network (or wicked, which is the network management daemon)

I initially tried just running the “/opt/vmware/share/vami/…” as that was part of the original VMware EVO:RAIL Setup Guide, however, I was receiving errors from the wicked service that the IP could not be changed. The above steps worked out and did the trick for me.

Using ESXi Shell

Configuring ESXI Management Network

EVO:RAIL Setup Guide

VxRail and Data Domain Virtual Edition

VxRail has taken off since being announced and a great new edition to the Marketplace will be Data Domain Virtual Edition or DDVE; as of this post I haven’t heard of an availability date for the Marketplace. DDVE is available for download from EMC however. The download is a .zip that extracts to a Folder containing an .ova for installation.

The addition of DDVE enhances the package for a full operating solution in the ROBO space and Small Business space by complementing the included VMware Data Protection solution that is powered by EMC Avamar. DDVE includes:

  • DDBoost, for increased backup speed by up to 50%
  • Encryption, through inline encryption for data at rest
  • Data Domain Replicator with up to 99% bandwidth reduction, for those replicating backups to another location
  • Data Domain Management Center for a single management interface for DDVE and DD systems

VxRail stems from VMware’s EVO:Rail, and utilizes VMware vSphere 6 and Virtual SAN 6.1 in a 2U appliance that houses four Nodes and associated drives. Various models and specs can be found on the VxRail page at VCE.

Testing was done with a single VxRail 120:

  • Processor Cores per node: 12
  • Processors per node: 2 Intel® Xeon® Processor E5-2620 v3 2.4 GHz
  • RAM per node: 192 GB (12 x 16 GB)
  • Caching SSD per node: 400GB
  • Storage (Raw) per node: 3.6 TB
  • Network Connection per node: 2 x 10 GbE SFP+

VxRail utilizes several interfaces to accomplish tasks; VxRail Manager gives you a Dashboard overview and allows deployment of VMs in 3 sizes, Small, Medium, and Large from ISO. VxRail Manger Extension allows you to view the physical platform, dump logs, view the Community Forum most recent posts, setup Support and access the Market Place to add additional components like CloudArray, and eventually DDVE. In order to deploy an OVA/OVF you’ll have to access vCenter via the IP assigned during setup, and that is where we’ll deploy DDVE from.

Reading through the ‘Installation and Administration guide’, and ‘DDVE — Best Practices’ guide will get you acquainted with requirements and help plan your deployment. Until your license is applied you’ll be limited to 500GB, regardless of the size of disks you deploy, and that should be adequate for most testing purposes. One of the recommended deployment settings from both guides is to use ‘thick’ provisioning, “Thick Provision Lazy Zero” is recommended for faster deployment. As VxRail uses VMware Virtual SAN for storage we are not given the option of thick during an OVA/OVF deployment through vSphere, however there is a way to provide for this method. We can create a new Storage Policy that equates to Thick Provision Lazy Zero and here’s how:

  • From the vSphere Web Client Home page, select ‘VM Storage Policies’vSphereWebClientHome-VM_Storage_Policies
  • Select the ‘Virtual SAN Default Storage Policy’ and then click the ‘Clone a VM Storage Policy’ button vSphereWebClientVM_Storage_Policies-Clone_VirtualSAN_Default
  • We’ll make one change from the Default policy, setting the Space Reservation to 100%. The default is 0%, effectively Thin Provisioning, so changing this to 100% will give us a Thick Disk VirtualSANStoragePolicy-SpaceReservForThick
  • Save the Policy to your preferred policy name and that’s it.

Now we can deploy the OVA for DDVE, the deployment will provision the default 2 disks as thick with Disk 1 at 250GB (OS Disk) and Disk 2 at 10GB (Cache Disk). You can leave the Storage Policy at the default for this part, or select the new Thick Policy that we created.

Once deployed, and before starting, we will need to add the Storage Disk(s) and this is where we want to make sure the Thick Policy is applied per the recommendation from the  ‘Installation and Administration guide’ as well as the ‘DDVE — Best Practices’ guide.

Select the DDVE VM in vSphere Web Client and edit the settings to add the Storage Disk. Here I’ve added a 1TB Disk and chosen the Thick Policy that we created.VxRail-DDVE-QualTest-DDVE_1TB_Config-DiskAdd

After adding the disk our VM summary should look something like this VxRail-DDVE-QualTest-DDVE_1TB_Config

Now that we have our DDVE configured we can start the VM and go through changing the default password, setting up networking and adding our license. Here’s an example of the DAT test, before creating the file system to allow for Read and Write tests, showing VxRail would support up to a 16TiB DDVE config!

VxRail-DDVE-QualTest-DAT_test-Apr18.2016


Hope you enjoyed this bit of info and it wasn’t TL;DR.

For a follow up I plan to cover upsizing the DDVE for an 8TB config, stay tuned!

Here are a few links for more info on Data Domain Virtual Edition and VxRail:

*Saw this via Twitter today:

Virtual Ghetto, run by William Lam from VMware (@lamw), posted that the vSphere Web Client deploys all OVA/OVFs as ‘thick.

Thanks to EMC E2E Validation Lab Team, VxRail Engineering, DDVE Team, and Jase McCarty (@jasemccarty) for answering questions, helping with setup, and putting up with me in general!


VNXe 3150 OE Upgrade Process

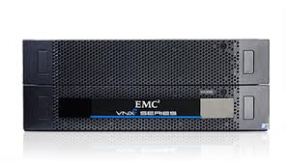
The VNXe 3150 is a tidy little array that packs quite a punch, and I’m happy that I have access to one.

Image

It handles my CIFS and NFS storage as well as running a small vSphere VM load. I’m running my VMs over NFS as that’s what I work with in vLab and want a similar setup as a playground.

I handle all the management over it and try to keep up with the OE Upgrades. I saw an internal post recently looking for info on the OE upgrade steps and remembered I had taken some screen shots during my last upgrade. So for your reading pleasure let’s take a stroll through the process.

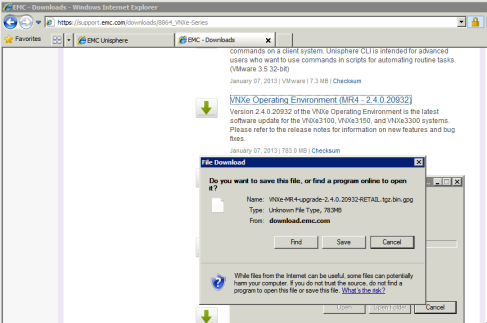
  1. Locating the latest release, or older releases for that matter couldn’t be easier. Pull up your favorite inter webs browser and point it at support.emc.com. Login with your credentials, you do have an account right? Select your product, and then click the Download section. You’ll see a list of all the great stuff available for that product, VNXe in our case, and select it to start the download to an appropriate location. I’ve just saved mine to the Download directory on the Server I use for management: Image
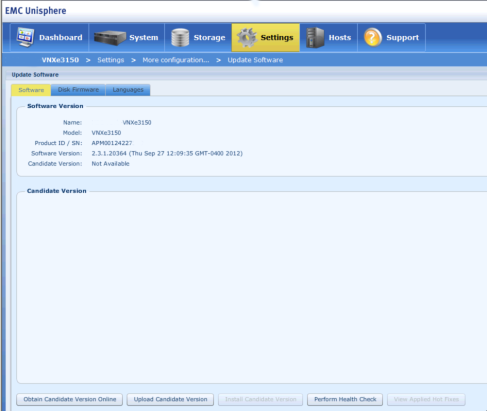
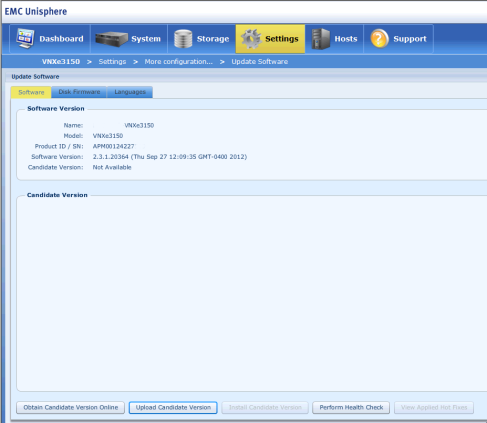
  2. Next I’ll point my browser to the Unisphere address of my VNXe and login. Navigate into ‘Settings->More configuration…->Update Software’. This is also where you can connect to download updates using ‘Obtain Candidate Version Online’ option in the lower left. I like browsing through the Support Download area just to see if there is something I missed…LOOK! Squirrel! :Image
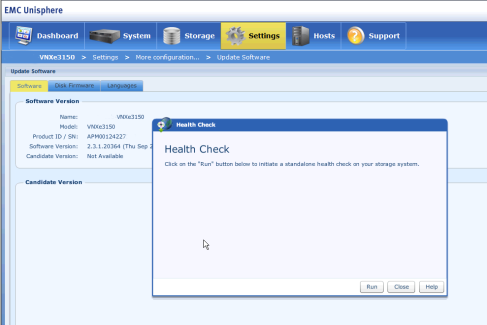
  3. You’ll want to run a Health Check to make sure things are in good order, and Unisphere will let you know if not. Click on ‘Perform Health Check’ and then ‘Run’:Image
  4. If you come up a winner now you can upload the update, if not…fix that thing!
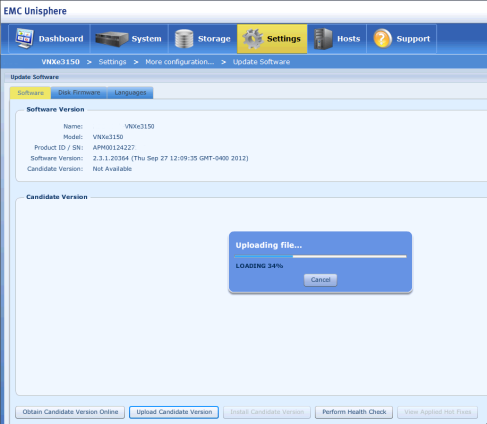
    Head back over to Support or ECN Forums and get some help if needed. Once you’re in the winners circle, click on ‘Upload Candidate Version’: Image
  5. It shouldn’t take too long and you’ll have the latest and greatest ready to go: Image
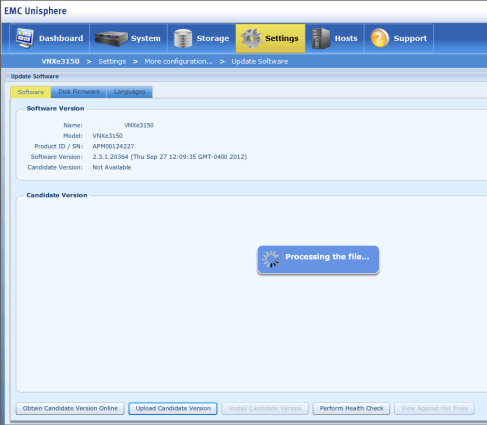
  6. Once uploaded the system checks the file integrity: Image
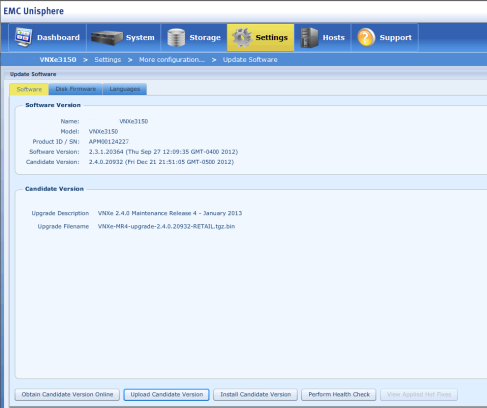
  7. Then lets you know things are in place: Image
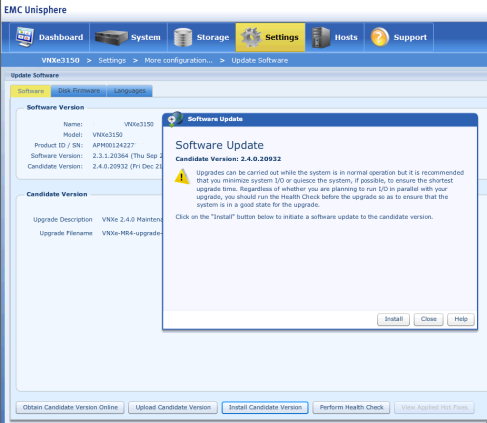
  8. Clicking ‘Install Candidate Version’, and I know you want to, will bring up this handy little reminder, and you should follow the advice given: Image
  9. Now I would normally due this over a weekend, after backups completed, or during some other low usage window, but since I was taking some screen shots I ran this during the day with most of my VM’s suspended.
    **Read the Guides. Make sure you have good backups. Low or no I/O on the array and the Health Check was run without errors reported. And you have enough free space to run the upgrade. Read the Guides**
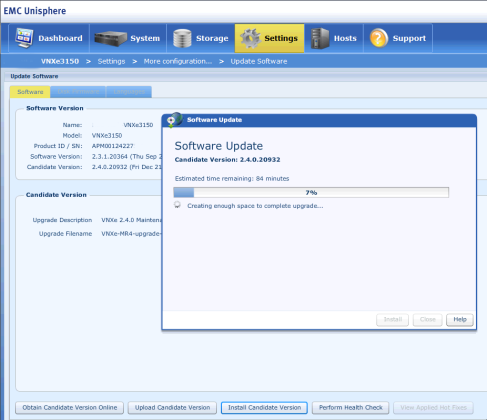
    Now we are ready to click ‘Install’ and watch the progress: Image
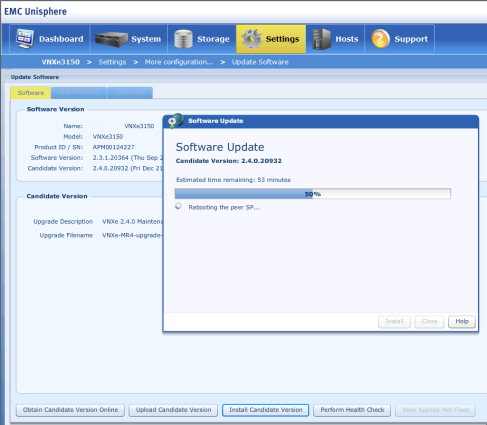
  10. In the Dual SP arrays the Peer SP gets the update applied first, and rebooted. Anything running on the Peer SP gets failed over to the Master SP, this is one reason you don’t want a load running when upgrading as you’ll see degraded performance: Image
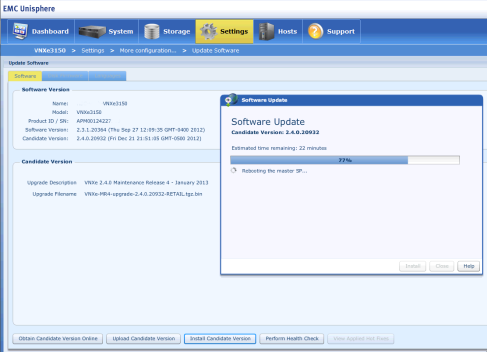
  11. Once the Peer SP comes back up, the upgrade gets finalized, and the Master SP load moves to the Peer SP so the Master gets a turn for the upgrade reboot:Image
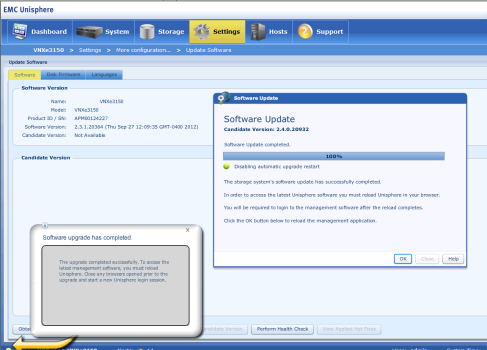
  12. Once the Master SP is back online and the load is shifted back to your original config the upgrade is complete! Woo Hoo! You’ll have to logout and back in to load the changes in Unisphere: Image
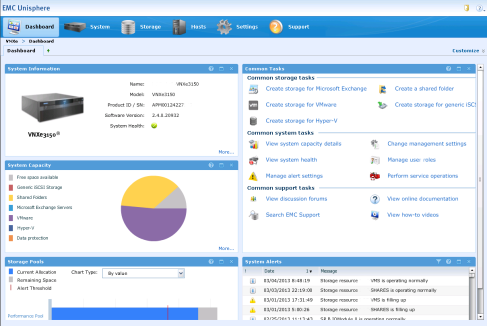
  13. Once logged back in you’ll see any changes in Unisphere, if there are new features that you are licensed for they will be available for use and nows a good time to check them out before you get busy… Image

I hope that was helpful, and maybe took away some of the intimidation of performing the upgrade. I can’t stress enough to read the guides, and check out the ECN Forums to post any questions or read what others have already posted…LOOK! Squirrel!